Read Happy Endings: Finishing the Edges of Your Quilt Online
Authors: Mimi Dietrich
Tags: #Crafts & Hobbies, #Quilts & Quilting
Happy Endings: Finishing the Edges of Your Quilt (24 page)

4.
Leave the needle in the fabric and lift the presser foot. Turn the binding so that it’s ready to stitch onto the next scallop. Pivot the quilt, lower the presser foot, and stitch for about 1" along the next scallop. While the quilt is still under the needle, pin the binding to the next scallop and proceed.

5.
Finish the bias binding with a diagonal join as described on
page 34
.
6.
Turn the binding to the back of the quilt one scallop at a time. When you reach an inside corner, turn one side of the corner to the back and pin it. As you turn the second side of the corner, a tuck will form a folded miter. The deepest part of the tuck will be at the outer edge of the binding. As the binding turns to the back of the quilt, the fold will taper to lie flat along the sewing line. Stitch the folded miter closed with a blind stitch.


Sculpted Edges
Sculpted edges feature curves that flow around the edge of the quilt. The design can include outside points, which are treated like corners, or inside points, which are handled like scallops. Because some of the edges are curved, you should cut the binding on the bias so that it will be easy to maneuver smoothly around the curves.
As you apply the binding to outside or convex curves, ease the binding around the curve as for scalloped edges (see
page 53
).

page 46
.
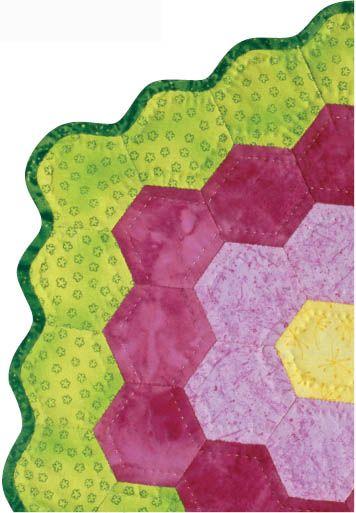
Grandmother’s Flower Garden Edges
The edges on Grandmother’s Flower Garden quilts are a series of 60° angles. The easiest way to bind these edges is to use 1"-wide single-fold binding cut on the bias and ¼"-wide seam allowances. This will make it easier to ease and stretch around all the patchwork angles. As you approach an outside angle, instead of folding miters, ease the binding to go around the point. On the inside angles, stretch the binding slightly so that it will lie flat on the edge of the quilt. Turn the binding over the edge for a ¼" finish.


Finishing Edges with
Special Techniques
If you are a creative quilter, try a special finishing technique for the edge of your quilt. Insert covered cording in the binding or between the front and back of the quilt for a coordinating accent or to complement one of the colors in your quilt. A fun finish for a scrappy quilt is to add prairie points. You’ll need extra fabric to make the points, but they create a unique border for your design. A baby quilt or a feminine design may lend itself to a ruffled edge. Ruffles require extra fabric, so plan ahead. You can repeat a favorite fabric in the ruffle or use pregathered eyelet lace or gathered trim for a fun and frivolous edge
.
Attaching Special Finishes
You can add a special touch by sewing covered cording, flat lace, piping, or rickrack into your binding. After completing the quilting on your project, prepare the edges for binding. Stitch the trim around the edges of your quilt, and then apply the binding over the trim to cover the raw edges.